Click any picture for original size...23 photos...
Comments are invited on individual pictures, or entire album...You may comment anonymously if you choose...
As told of here, Truckman's truck saga has entered a new chapter...This time around, we discuss what it takes to add some lighting to the Beast, and therefore become more visible to the public, some of whom in the past have been unable to see one of Truckman's previous rides in traffic...Wishing to avoid any such occurrence in the future, the decision was made to add a bit of visibility to this truck, as well as extend my own vision of my surroundings further than that provided for when the Dodge brothers' successors rolled this truck off the assembly line...
Lighting furnished upon the truck's acquisition can be studied in this photo essay...The differences between then and now can be seen below...
 |
| We begin with an LED lighting strip commonly seen under the tailgates of many pickup trucks...This one incorporates tail lights, emergency flashers and turn signals, all functioning together with the factory installed lights...These are furnished with two-sided adhesive which works well with the smooth metal found on OEM truck beds, but I didn't trust it on the diamond plate of my flatbed...Therefore I drilled the appropriate holes, and secured it further with zipties...Plastic bolt-on clamps were furnished with the light unit for this purpose, but I used the zipties because they are less visible... |
 |
| The first of several marker lights beginning with driver's antenna bracket... |
 |
| And the door gunner's side... |
 |
| These LED light strips are tail/turn/brake lamp combinations...I had to extend the lamp manufacturer's skimpy wiring, and cut recesses to make it exit at the bottom as I wanted...I sealed the openings I made with RTV sealant... |
 |
| And the naviguesser's side...The unsightly wiring is just loosely hung here before installing the other deck lights...All will be neatly tucked away in wirelooms... |
 |
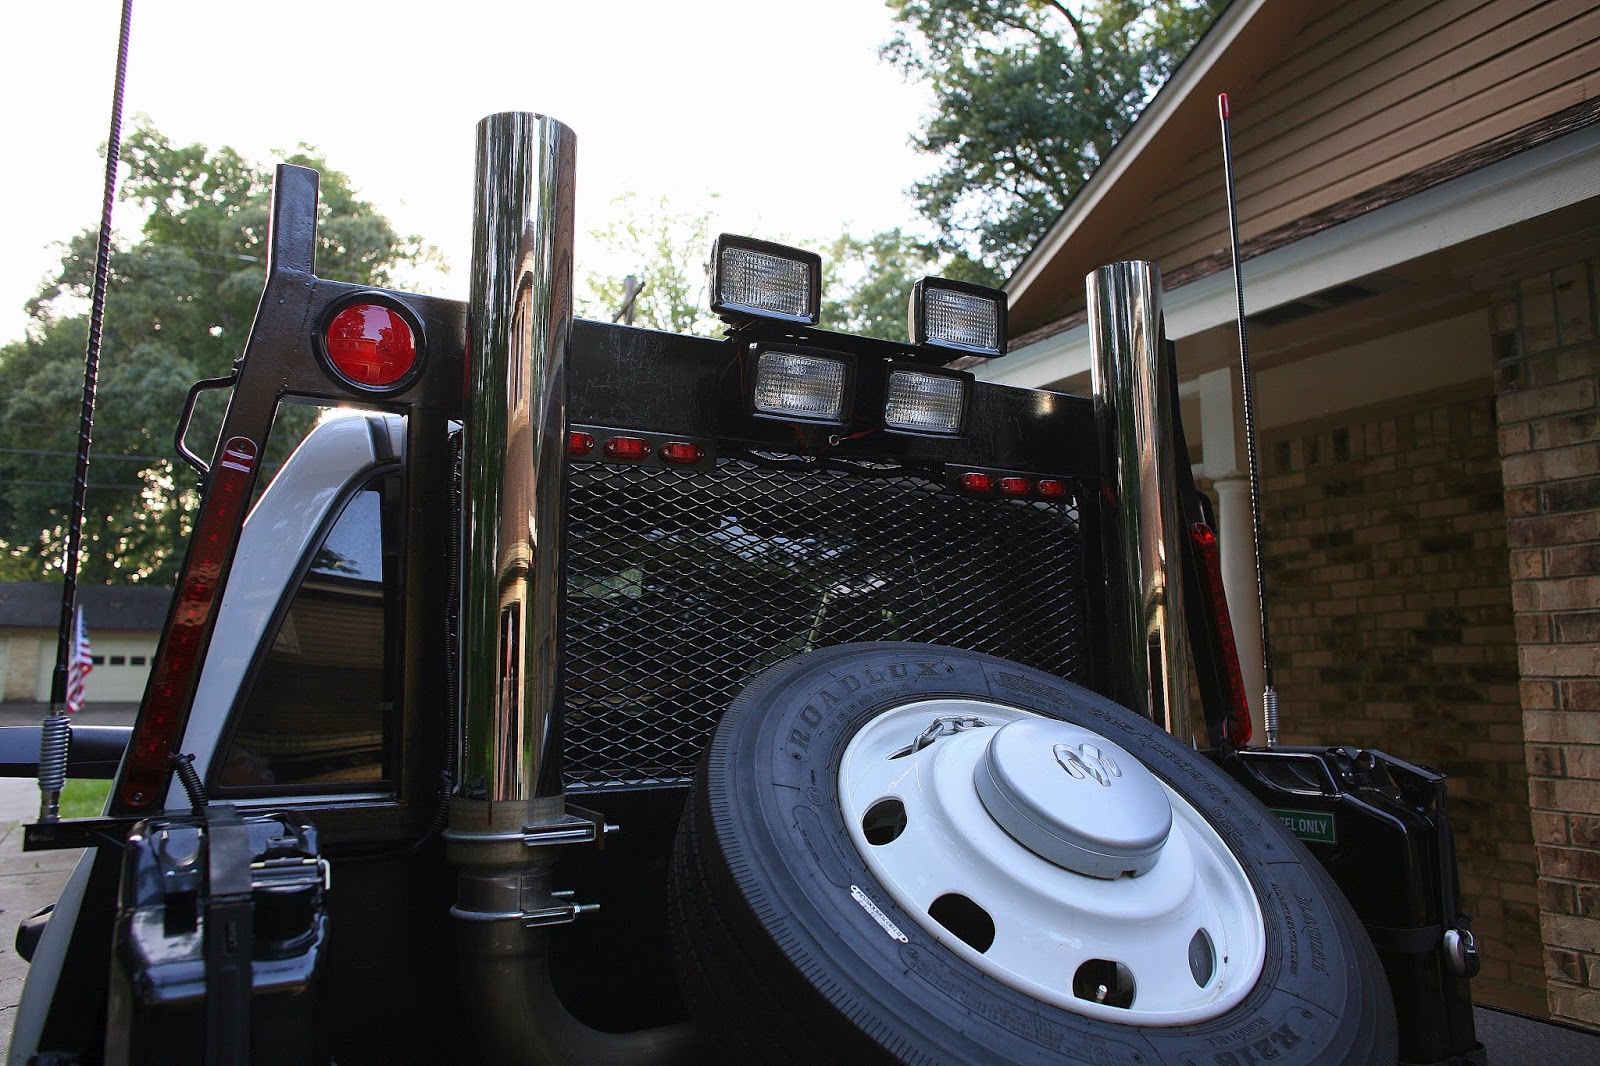
| The tractor lights seen on the headache rack are my new cargo deck lights... |
 |
| I found a license plate bracket that was the right size to repurpose into a light bracket...There is still room on it for two identical lights which will be backup lights...The wiring was left hanging because I fell backwards on the deck, wrenching my knee...That was enough for one day... |
 |
| A rather blurry picture at dusk due to the long shutter time and the handheld camera, but it illustrates the amount of red light from the Hella map light attached to the right side of the console...I removed the right side middle seatbelt bracket (now unused) to make room for it... |
 |
| I had time to mount two more atop the headache rack before the rain started again... |
 |
| Two uppers for backup illumination, and two lowers to light up the cargo deck... |
 |
| I didn't find anything readily available for rear marker light mounting panels, so I cut up some more angle iron...Heavier than necessary, but durable... |
 |
| And the installed and wired view...A little more wiring for the upper lights, and it'll be time to hide it all in split loom...The left round light is not in its hole in the headache rack because one of the filaments was burned out...I'll get two new LED units and replace both...NEXT DAY UPDATE: Both 4" round lights and grommets were replaced with LED's... |
 |
| Pictured above is the view taken after wiring was accomplished, cargo lights adjusted and functionality and operational tests were completed...The mess under the flatbed and cab are almost as untidy...Next comes the job of encasing all the unsightly wiring in split loom, and tucking all neatly out of the way... |
 |
| Several sweat-soaked hours later all the previously exposed wiring is now safely tucked away out of the weather in split loom, as seen above and below... |
 |
| And all circuits were re-verified as operational... |
 |
| Moving forward, We begin by removing the left headlight assembly... |
 |
| The red wires seen along the top of the inside fender transfer current from the console switches to the new relays to power new driving lights and fog lights...Like most of the other new wiring, it was encased in split loom... |
 |
| The relays, seen with their green fuses were mounted to the bulkhead, then wired to be triggered by different light circuits...As usual split loom hides my ugly wiring... |
 |
| The top relay controls the high intensity driving lights, and is triggered to work only with the high beams activated...The lower relay controls the fog lights, triggered by the parking lamp circuit...The normal factory installed lights work as usual, but the new lights will not operate until their trigger sources are activated... |
 |
| Here we see the front end transformed with new lights and the license plate has been moved to a more visible location on the brush guard... |
 |
| Left side view shows the alignment of the new lights so as not to obstruct visibility with factory lights, nor to interfere with airflow through the grille... |
 |
| Truckman finally had a lying down job as he reclined on his creeper to drill the necessary holes for the new marker lights... |
|
 |
| The next truck pictorial will be photographed after a much needed clean-and-shine session, and will include night photos showing the new lights in action... |